


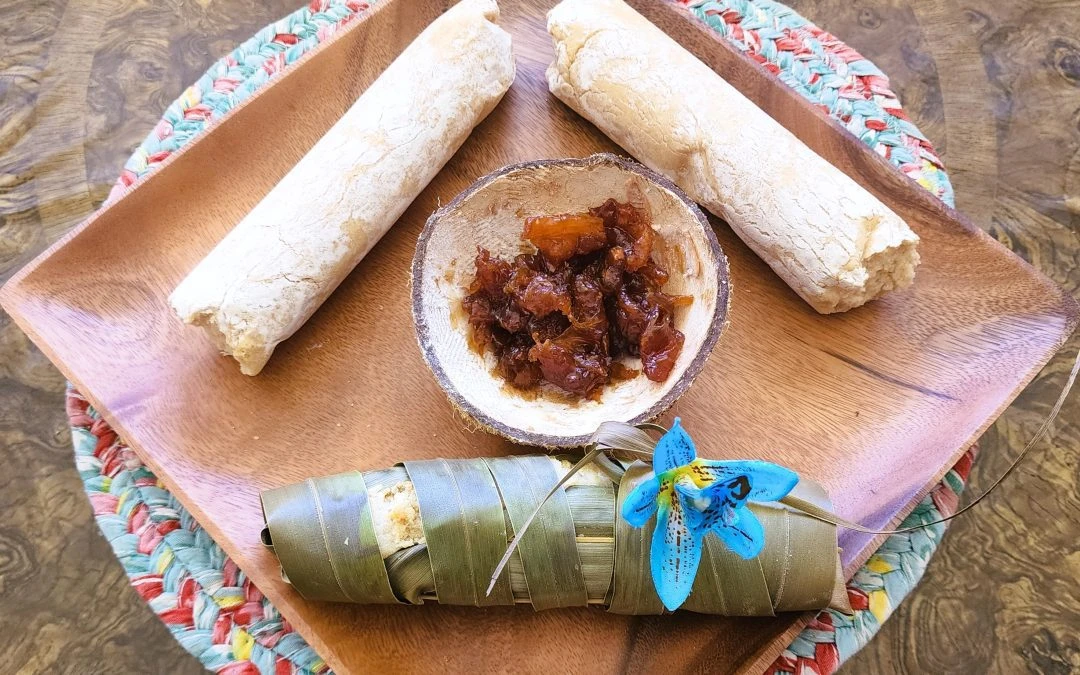
Traditional Tahitian Coconut Bread Recipe
Behind the Recipe: Meet Gina Pasi
A cooking exhibit highlighting traditional Tahitian Coconut Bread has been demonstrated in the Tahiti Village at the Polynesian Cultural Center for decades. The ingredients and presentation are simple, the taste is simply amazing.

We’ve shared the recipe with our guests, but we wanted to give our readers a bit more. We reached out to Regina (Gina) Mo’o Pasi, a Polynesian Cultural Center employee since 1968, who has worked as a dancer in our evening show, and a cultural specialist and demo guide from our night show to the Tahitian Village. Many mornings she would come in early and prepare the sample loaves for the day.

Gina is from the island of Hikueru which is situated in the Tuamotu Archipelago of French Polynesia (sometimes incorrectly referred to as Tahiti, which is just one of the island chains in this former French colony). She fondly remembers her grandmother preparing coconut bread, which she would deep fry, or sometimes make into dumplings, and how hard it was “not to eat” those amazing treats filled deliciously and with the magical “touch of love” from her grandmother.
Recently, Gina came by to personally demonstrate how to make the perfect Tahitian Coconut Bread. I am so pleased to be able to pass it on to you!
Tahitian Coconut Bread Recipe
Ingredients
- 3 teaspoons baking powder
- 3 cups sugar
- 1½ cups water
- 4½ cups all-purpose flour
- 2 cups freshly grated coconut, toasted in the oven at 175° F (80° C).
Tip: If fresh coconut is unavailable, use unsweetened shredded coconut. If using sweetened coconut, reduce sugar to 2½ cups.
Directions
- Preheat oven to 350°F (175°C) degrees.
- In a large bowl, combine flour, sugar, and baking powder. Stir until well mixed.
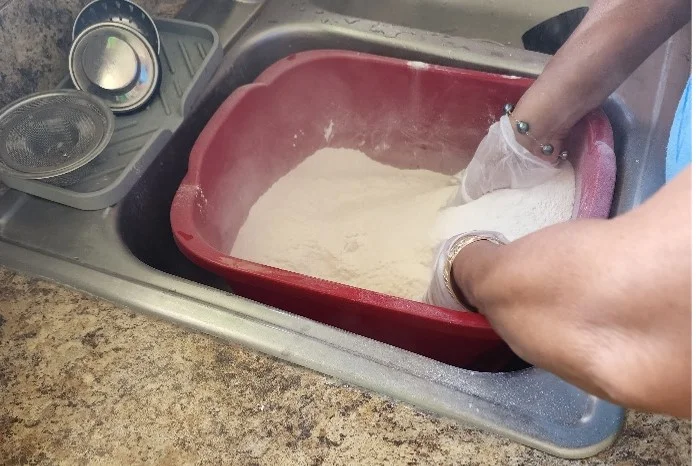
- Fold in the coconut and mix carefully. Use as much or as little as you like to suit your taste.
- Add the water gradually and mix until incorporated.
- Mix until a soft dough forms. Add more flour if the dough is too sticky.
Tip: Rub coconut oil on your hands to prevent sticking.
Knead the dough until smooth, scraping the sides of the bowl to incorporate all ingredients.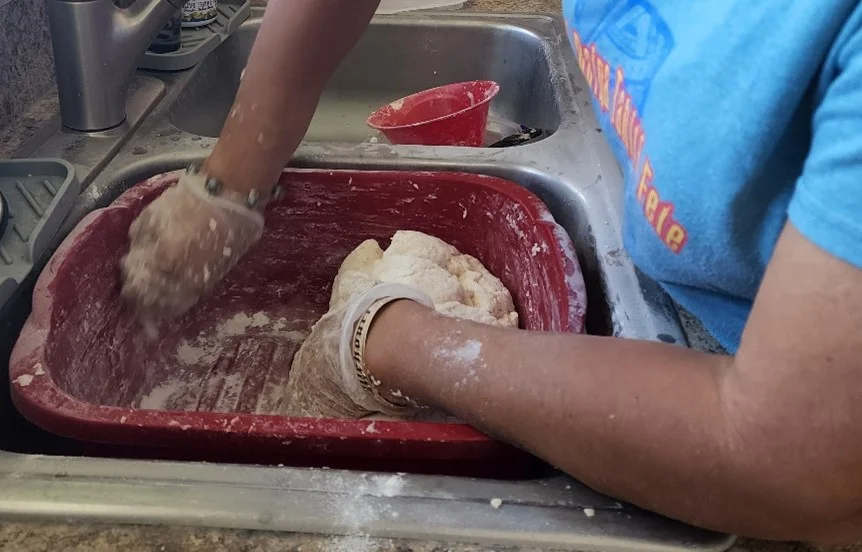
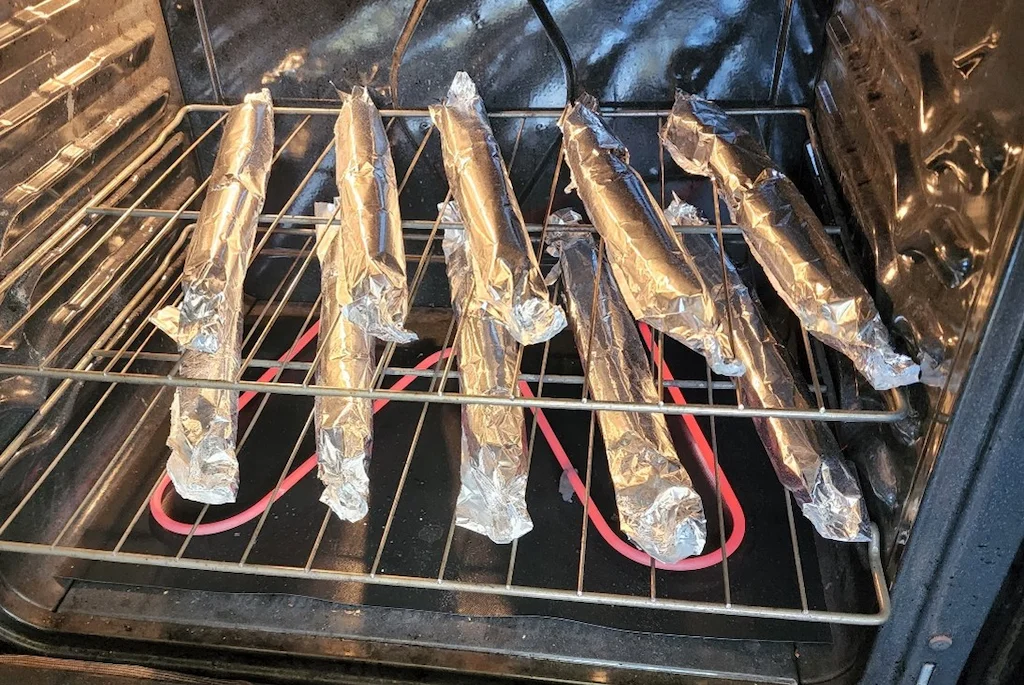
- Divide the dough into 10 equal portions. Roll each into a log and wrap in aluminum foil, sealing the ends by folding and pinching.
- Place the logs directly on the oven racks, positioned diagonally for even baking.
- Bake for 1 to 1¼ hours, or until the bread is fully cooked and no longer doughy in the center.
How to Make and Wrap Traditional Tahitian Coconut Bread
Using coconut fronds instead of aluminum foil for a more authentic version.
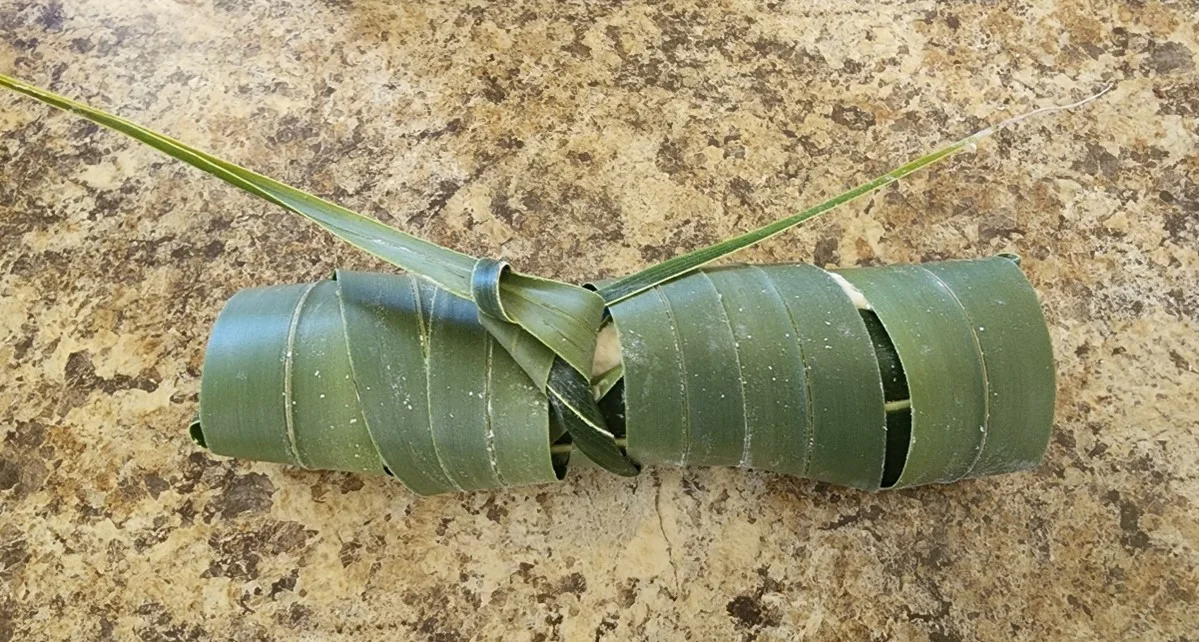
Go traditional by wrapping your dough in coconut fronds by following these steps:
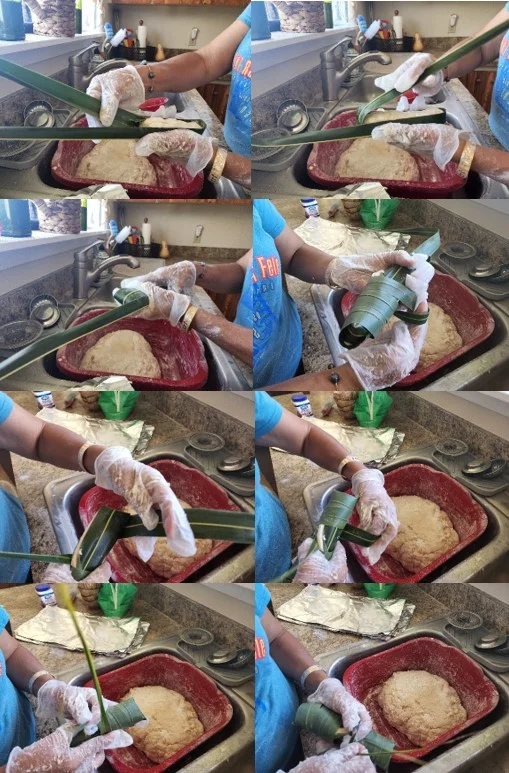
- Select 10 fronds approximately 2-3 inches wide and just under 2 feet long. Make sure that they are green and pliable.
- Wash thoroughly and dry.
NOTE: Roll bread dough into shorter logs, approximately 8 inches long. - Place one coconut bread dough log in a frond, making sure that it lines up exactly at the bottom (wider end) of the coconut frond. Take another frond and place it next to the other, slightly overlapping so that the dough is now cradled in both fronds.
- Fold one of the fronds over and up the dough towards the opposite end so that it now completely covers the dough. It should exceed the length of the dough by several inches.
- Fold the end diagonally across the end of the dough and begin to wrap it backwards around the dough, heading back towards the beginning. Leave about 2 inches unwrapped.
- Take the other frond (which is already placed in position against the first frond) and fold it diagonally across the bottom edge of the dough log. Wrap it slowly towards the middle so that it will meet the other wrapped frond.
- Tie off in the middle. It should basically now cover the entire log of dough.